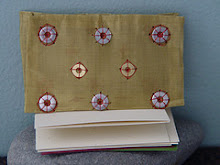
Tutorial on creating a Wool Display Single Egg Holder.
This tutorial is a really great craft tip because the end result can be used for so many things - egg holder, little display, napkin holders...
My favorite it to use the eggs as table settings/placements... you can write each guest's name right on the egg... It really seems more of a craft tip than tutorial to me, because it is really so easy and fun! Enjoy!
Materials Needed:
cotton thread, 5 one-inch wool circles,
embroidery or sewing needle (large eye needles are great)
a pair of scissors

Step 1:
Thread the needle with 3 feet of thread (or an arm length). Use one single piece of thread doubled - tied at the end (it looks like you have two strands of thread).
Poke the needle through the side, going through the diameter of the circle. Leave at least 5 inches of thread out of this first circle (you will be using this again in the final step).
The wool is thick enough to hide the thread as you go throughout the diameter, so be mindful that you are pulling the thread through the wool to hide the thread within the wool. Thread through all five circles.


Step 2:
When you've threaded through the diameter of all five wool circles. It will look like a garland. Bring the last sewn circle to the first sewn circle, and tie a knot.


Step 3:
Re-thread through each diameter back to the beginning. And then Snip the end closely to the wool to hide and fringe.
(Remember, you've already tied a knot, so your work will not unravel).


Step 4:
Thread the loose thread from the first circle though the diameter of each circle to hide that extra bit of thread. (see below picture)

Step 5:
Squeeze each wool circle in half to help mold the wool giving the egg a little more support.


Now you are finished with your little single egg holder!!! For Jumbo eggs, use 6 one-inch circles ~ and have fun! Your circles can be embellished before or after you've completed this, using beads, embroidery thread... limitless possibilities...
http://www.PaperPennyRug.com
Tutorial by L. Mitchell, 2009 all rights reserved
Have fun making these!!!
I bought the wool circles for this project from a wonderful etsy seller
ragamuffin2006.etsy.com& they were nicely packaged with a little extra surprise too! I love the butter yellow color!


